Thursday, 19 December 2013

Cocktail Hour

Quince Two Times..

It seems fitting that my last post before the Christmas hiatus is booze related.

As observant readers will already know I recently ended up with rather a lot of home-made quince cordial (after a rather less than successful attempt at making jelly.)

As nice as cordial is mixed with water, the mind naturally drifted to how I might more pleasantly imbibe some of this blasted stuff. Cocktails, that's how.
After much experimentation (well, a pleasant gin-soaked afternoon) I came up with the following:-

The Quince Regent.

The Quince Regent

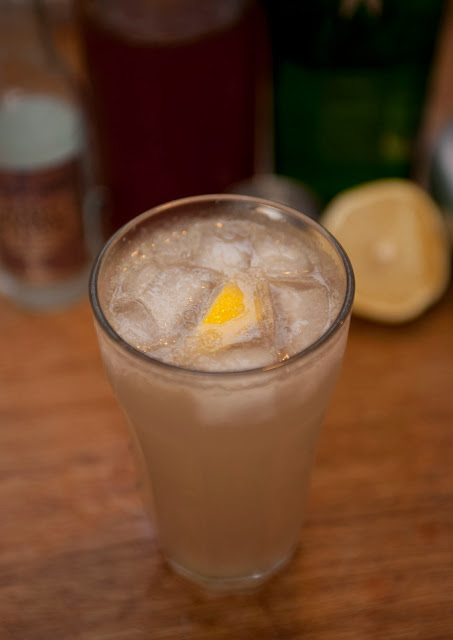
This first cocktail is a variant of last week's Gin Fizz. I simply swapped the simple syrup for the quince cordial. Taste wise a hit of aromatic quince gives way to a very zesty finish, the soda water making for a refreshing winter bracer. 

Essentially you end up a rather enjoyable gin & quince laced lemonade - giving you a deceptively strong highball that it's all to easy to gulp down quickly!

Ingredients & Equipment:


  • 40ml Dry Gin
  • 20ml Quince Cordial
  • 20ml Lemon Juice
  • Bottle, Fever Tree Soda Water
  • Lemon wedge, to garnish
  • Highball glass
  • Cocktail Shaker
  • Ice

Procedure:


  • Add the gin, cordial and lemon juice to a cocktail shaker and, well, shake.
  • Pour over ice in to a highball glass.
  • Top with the soda water and stir.
  • Garnish with the lemon wedge


The Quinclet.

The Quinclet

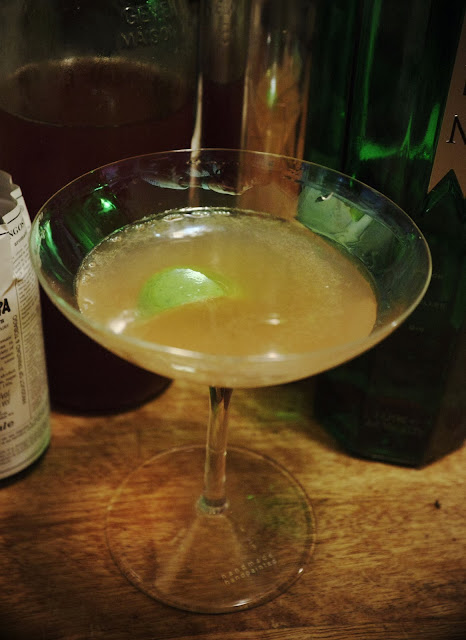
Essentially the bastard child of a pink gin and a Gimlet this one. Despite the fact it is inescapably pink, this drink will put hairs on your chest. Don't let anyone tell you different.

The quince gives the finished article a more rounded flavour than a straight gimlet, however the lime juice and bitters lend a pleasing bite to the finish.

Ingredients & Equipment:

40ml Dry Gin
20ml Quince Cordial
20ml Lime juice
Liberal dash, Angostura Bitters
Lime zest, to garnish
Cocktail shaker
Ice 
Martini glass, chilled

Procedure:

Pour a couple of drops of bitters in to the martini glass.
Give the gin, cordial and lemon juice a jolt in a shaker with a couple of ice cubes.
Strain in to the martini glass and garnish with a strip of lime zest.
Sit down before drinking!

I am now retreating to darkest rural Sweden for the duration of the Festivities, but will be back with more drink and fashion related ramblings in the New Year. 

I wish you all a very merry Christmas. Tinkerty-tonk!

Wednesday, 18 December 2013

How To Avoid Gortex...

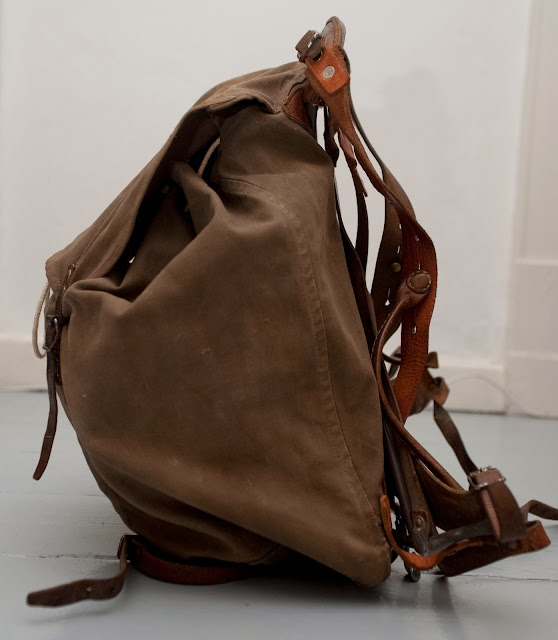
Restoring a Vintage Swedish Army Rucksack...

... Or at least pepping it up a bit.

1950's Swedish Army Rucksack
Not a stitch of technical fabric in sight.
The search had been on for a while for a decent vintage or reproduction rucksack or day sack. The Swedish outdoor brand Fjällräven make fantastic retro inspired, and very durable, trekking kit. However, their price point is rather high - at nearly 1,800 Swedish kronor (approx £200) for a 40 litre bag I decided to look elsewhere.

It's clear that Fjallraven have taken as their inspiration the original Swedish and British Army commando rucksacks from WW2.

1950's Swedish Army Rucksack1950's Swedish Army Rucksack

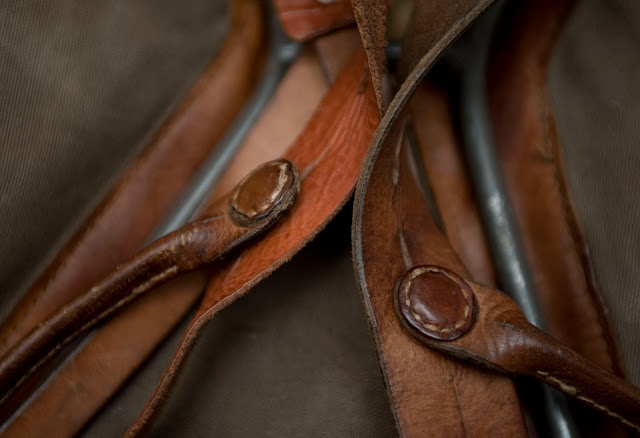
So I set about finding one. This example was £20. According to the seller the pack is post war. Metal framed and made from thick field grey canvas and heavy leather, 60 odd years on the rucksack was still in pretty good condition.

A few minor repairs have been done on the canvas and the leather was a little tired, but that's it.
The stitching was all in good condition, with no repairs needing doing.

I set about washing the canvas first. I scrubbed the lot with a hard brush in warm water. No soap. This supposedly expands the canvas fibres, and as they re dry they become even tighter - hence more water resistant.

As this was drying I turned to the leather, applying a liberal coat of Leder Gris leather grease to all of the harness and straps. Leder Gris is made of entirely natural ingredients, with none of the degrading chemicals you find in normal polishes like Kiwi. This helped to moisten the quite dry leather fixings after what presumably had been long years of storage.

1950's Swedish Army Rucksack
Despite years in storage the dry leather responded wonderfully to a working over with some leather grease.
I was in two minds as to whether it needed waxing. There are separate schools of thought here. The first says just wash the canvas - the wet fibres will expand and then shrink tighter with drying. To wax a vintage item will only push the dirt you could not wash out deeper in to the fabric, shortening its lifespan.

The second argues that a coat of wax will obviously increase the waterproofing - more important on something designed to spend its working life outdoors.
There was a district whiff of paraffin prior to the wash, so the pack had clearly been waxed previously.

Fjallraven Greenland Wax
You can try making your own with a mix of bees wax and paraffin, but I had some Fjallraven Greenland wax to hand anyway.

I applied a thin layer all over, but paid particular attention to the seams, bottom and lid - all points that get the most wear / exposure.

You simply warm the wax and rub it in to the canvas as evenly as possible. Once that's done the wax needs drying - I stole the wife's hairdryer and just worked over the pack panel by panel.

It should be good for quite a few Danish winter downpours now.

However you choose to treat your pack, if you're going to be out in inclement weather you'd use a dry bag inside the pack anyway.
When the pack next needs waterproofing, I might try making my own wax and applying it melted with a brush - this is supposed to give a much more even finish.

1950's Swedish Army Rucksack
Tool attachment loops. Not that I have an ice axe, but if I did these would be most useful.

1950's Swedish Army Rucksack
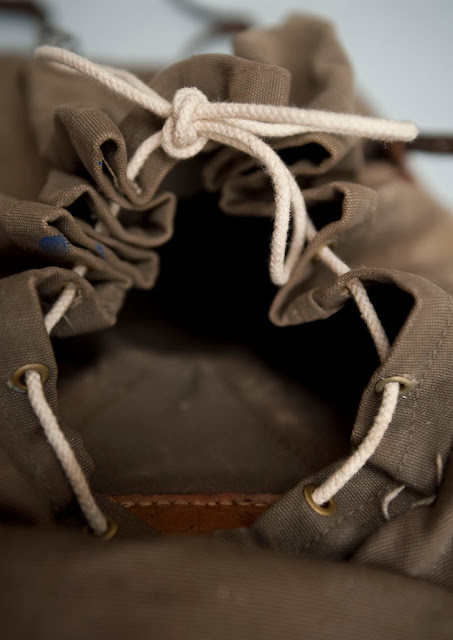
A simple top loading pack with heavy duty draw string closure.
To wear the pack is surprisingly comfortable, and at 40 litres, is perfect as a overnight or weekend bag. There are loops for a bed roll and an ice axe / entrenching tool, so it is definitely still functional in it's original role. I'm not sure I'd want to take it on a long trek though.

With minimal expense, time and effort you can easily bring one of these bags back to life. Why waste money on modern branded examples?

1950's Swedish Army Rucksack
Bed roll or sleeping mat straps .

If you're tempted they are still readily available from Ebay and various surplus stores.


Saturday, 14 December 2013

Cocktail Hour

Sloe Gin Fizz

Amidst the countless Egg-nog recipes that pop up when researching festive cocktail options one alternative that caught my eye was the Sloe Gin Fizz.


The Gin Fizz, essentially a sour with added soda water, dates all the way back to the 1862 tome How To Mix Your Drinks by Jerry Thomas. It is important to distinguish between a Gin Fizz and a Tom Collins - the former is made with dry gin, the latter with sweeter Old Tom gin. 

If we're being strict about things a gin fizz should not be served with ice, whereas a Tom Collins is poured over rocks. I've ignored that here. 
You should really use a soda syphon too, if you don't have one just pour the soda vigorously to create lots of bubbles.

My dear old mother makes a batch of sloe gin every autumn, bottles of which are generously donated to yours truly.
I normally drink it straight or on the rocks, with only a single ice cube. But sloe gin also makes for a fantastic cocktail ingredient. In this case it turns a refreshing summer high-ball in to a pleasing winter treat.

I've not tried the commercially available sloe gins, though I suspect they are rather less sweet than the family home brew. I have upped the lemon juice content accordingly. If using shop bought gin use 10cl less lemon juice. I've also sharpened things up with a jolt of Tanquary, but feel free to experiment.

Ingredients / Equpment

  • 30cl Tanquary Gin
  • 30cl Sloe Gin
  • 30cl Simple Syrup
  • 30cl Lemon Juice
  • Bottle, Fever Tree Soda water
  • Cocktail shaker
  • High-ball glass
  • Ice
  • Lemon wedge to garnish

Procedure

  • Mix the gins, lemon juice and simple syrup in a cocktail shaker
  • Fill a high-ball glass with ice and pour over contents
  • Top up with soda water
  • Stir and serve with the lemon wedge
As ever, if anyone has any variants of this recipe that might be of interest do let me know.

Cheers chaps!

Thursday, 12 December 2013

Chaps Can Bake Too.

Swedish Saffron Buns.

No Swedish Christmas is complete without buns... 


Saffransbullar, traditionally made for Sankta Lucia on 13th December, are eaten over the course of Advent. Most Swedish families will have their own recipe, however there are umpteen available online.

Along with pepparkakor (ginger-snaps) the smell of them baking, for me, is about as Swedish as it gets. For Swedes, these two things signify Christmas and the mere thought of a yuletide without them would provoke social collapse. (Well, people might start openly disregarding traffic laws or not retuning library books on time, which amounts to the same thing.)

By weight saffron, derived from dried stigmas of the Saffron Crocus, is the world's most expensive spice, so it is no surprise it's used only for high days and holidays. Your supermarket will generally have small sachets of the stuff available.

Interestingly, Cornwall has a long tradition of baking with saffron too, both in bun and cake form. As with Sweden this was only done on special occasions, as the name Revel or Tea Treat buns would suggest. The Cornish tradition is to spice things up with cinnamon and / or cardamon. A fantastically moist spiced saffron fruit cake we tried in St Ives lives on in the memory. (Alas the name of the bakery escapes me.)

The Swedes keep things simple, just adding raisins to the mix. (Well, they do consume cinnamon buns (kanelbullar) for the rest of the year, so advent probably comes as a welcome break.)
We've taken the liberty of adding a dash of rum - this intensifies the flavour and deepens the golden yellow colour of the finished buns.

Easy to make, saffron buns really are a treat, especially when washed down with lots of glögg. (Female Swedish helper optional.)

Ingredients:

  • 1g saffron
  • 2tbsp rum
  • 50g fresh yeast
  • 175g butter, room temp
  • 500ml milk, room temp
  • 200ml sugar
  • 1/2tsp salt
  • 800g white flour
  • 100ml rasins
  • 1 beaten egg, for glazing

Procedure:

  • Mix the rum and saffron together in a glass and leave for a half hour to infuse
  • Cube the butter
  • Crumble the yeast and mix with the milk, butter and the saffron rum in a bowl or mixer
  • Add the sugar, salt & flour and work together for 15 mins in a mixer, or 20 mins by hand
  • Cover & leave to rise for an hour at least (or over night somewhere cool - some say this improves the flavour)
  • Soak the raisins in water for 30 mins. (This way they won't rob the buns of any moisture when baked)
  • Take the dough out of the bowl and, with a little flour, work in to shapes. (The S shape called Julgalt is most common, but there are several others)
  • Place them on a baking tray, lined with paper, and leave to rise for 30 mins
  • Pre heat oven to 225°C
  • Plonk two raisins at the tips of the S and glaze with the egg
  • Bake for 8 to 10 mins.
  • Leave to cool on rack under a tea towel
Perfect for a boozy elvakaffe!


Wednesday, 11 December 2013

Old Town Clothing.

A Brilliant Little World Of Its Own - Interview with Will Brown

The Norfolk based brand Old Town Clothing have been long standing favourite of mine - the Navy twill suit I bought from them years ago is still in regular service.

On behalf of Denim Hunters* I recently caught up with Old Town's co-founder, Will Brown, for an interview. (Read an edited version there and see Matt Hind's fantastic Piccadilly Pleasures images used for the article.)
The Marshalsea in Khaki canvas. This slightly fitted 4 button jacket has a district 1890's feel to it.
(I've been wearing a Navy version for 7 years now.)
High Rise trousers in the same canvas. They have a pleasingly high waist and wide leg.
 Originally based in London, Will has been making clothes for over 30 years. 
Old Town got its start in the mid 1980’s, “I opened a shop in Shoreditch in 1980 when there was little other than the last remnants of the furniture making industry in the area. It wasn’t very successful, but I was supplying a few garments to a boutique called ‘Demob’ in Soho. I was given the run of a spin-off shop, then called ‘Demobilization’ and by rearranging some of the nice fabricated letters on the facia it became ‘Old Town’.”
At first Norfolk might seem like an odd change of location. But it is consistent with Old Town’s desire to plough their own furrow. Indeed, the name “Tin House” was inspired by a local property they restored. 
Will was frank about the reasons for moving there, “My partner Miss Willey and I were living on a pretty grim estate in South London, but we found an old caravan on a bizarre plot in north Norfolk. We became attached to the area and found a shop with a flat in a 17th century street in Norwich. So, it seemed a good swap for Kennington. We opened Old Town so long ago the word ‘vintage’ hadn’t been invented (except when referring to wine or cars.)
The Marshalsea again - in Tin  House striped "Pantry Denim."
All patterns are modern in that they were designed by Will, but have a strict aesthetic firmly rooted in early 20th century utility clothing. 
Discussing what informs Tin House designs he said simply, “Historical imagery, costume and design reference. How to get the essence of a style with the least strokes? That’s what interests me most.”
 Old Town have developed a loyal following over the last few years. This rigorous aesthetic is part of their appeal. In the ever changing fashion world Old Town offer a simple continuity. 
Work wear is becoming increasingly popular, with many brands claiming to produce “heritage" or “authentic” items - something that Old Town stand against, “We never intended Old Town to be either of these. I don’t know at what stage designing and making something stopped being quite sufficient. 
The Short DB Jacket in 12oz Denim
It does rather feel that things have to have some sort of provenance today, however spurious. It’s quite a bloke-ish thing about spec and authenticity. I think that Old Town is more in the tradition of the early boutiques from the sixties and seventies like ‘Biba’ and ‘Let it Rock’ which were brilliant little worlds of their own.”
Old Town prefer to focus on quality and craftsmanship - all garments are hand made to order in and around the small village of Holt. With an average of 70 garments produced a week, the work is done by both Will himself and local artisans. Quality clothes take time. There is no web shop. You make your selection on a printed order form and post it off to Miss Willey. Turn around time for a garment is 4 to 6 weeks.
Orfords - a pattern of rugged seafaring jean much favoured on the Suffolk coast between the wars.
As Will says, “That’s how long it takes. Now just say that we were on a TV show like Challenge Anneka (remember that?) I dare say we could have a pair of trousers cut, sewn, buttonholed, buttoned, laundered, pressed and packed within a few hours. In practice trousers are cut as a group, the sewing ladies take their work on a weekly basis, the laundry similarly and so on. You can see how the days add up.
Also, I suppose customers do warm to the notion of the service and the necessary wait.”
All of Old Town’s material is UK sourced too. With so many labels looking for cheaper options abroad it is fantastic to see a brand do this. 
However, asked what Old Town look for when choosing fabric Will was quite direct, “Availability. We have been very fortunate with woollen cloths as they are woven in Britain and the minimum quantities are small (200 metres or so).
Cottons are tricky, even good old navy or khaki 3111 cotton drills aren’t that easy; we have to have the khaki dyed.
I would love to find interesting and obscure denims such as the old fashioned ‘salt and pepper’ effect that one used to see on warehouse coats. We would be laughed off trade stands at fabric fairs with the rather modest quantities that we could commit to. If anyone knows of interesting denims sold in less than a shipping containers worth I would love to know.”
A small range of ladies clothing also includes these, the no.5's - here in 12oz denim
Will may have very set ideas on what Old Town are, but not at the expense of the brand developing, “I hope it will continue to evolve, my instinct is towards a more modernist feel but I don’t know if customers would like it or not so I try to slip a bit in here and there.
What I’d really like to do is get off the buttonhole machine and have time to experiment, design clothes… in fact, just the nice bits but who wouldn’t?”
 Given that “a more modernist feel” probably equates to post 1930 die hard fans need not worry. Refreshingly un-fussed by the vagaries of fashion, Old Town simply focus on doing what they love. There is no empty marketing rhetoric here. Such integrity is sadly a rare thing these days.
Old Town is indeed a brilliant little world of its own, and whilst it’s clear that any brand has to evolve to survive, one hopes that Old Town keep doing what they do best - minimal yet beautiful clothes made by people with a profound love of what they do. If only more people thought this way. I urge you to check out www.old-town.co.uk.
*Unsurprisingly DHs preoccupation is with all things selvedge denim related. It is worth stressing that selvedge does not necessarily equal quality. By the same token not all non selvedge denim is bad.


Friday, 6 December 2013

Cocktail Hour

A Short History of the Old Fashioned.

This classic bourbon based cocktail has seen something of a revival in recent years. A good thing in our view.
Paul Henreid & Bette Davis being served  an Old Fashioned in Now, Voyager (1942)
The Old Fashioned goes back a while.

The mixture of spirits, water, sugar and bitters originally came in to being as a morning bracer circa 1800. Often referred to as a Bittered Sling, gin, rum, bourbon or whiskey were freely interchanged. One argument is that spirits at the time were not of as high a quality as today, thus ways were found to flavour or sweeten them.
The addition of bitters, with its medicinal botanicals, technically makes the Old Fashioned an aperitif, served before a meal to stimulate the appetite. We're fond of a drink here at NU, however, hitting the hard stuff prior to our morning Weetabix is a bit much!

It is generally accepted that the Old Fashioned proper was invented around 1881 in Kentucky by the barman at The Pendennis Club in honour of a Colonel Pepper.

There are a multitude of differing recipes out there, specifying all sorts of bells and whistles. Ignore them.
The best cocktails are classics for a reason - they have been kept simple. Resist the urge to garnish with large wedges of fruit, cherries and so forth. You are not making a fruit salad.
Friday is here at last!

Ingredients / Equipment:

  • 60ml Bourbon or Rye
  • 20ml Simple Syrup*
  • Dash, Angostura Bitters
  • Strip of orange zest
  • I large ice cube*
  • Old Fashioned glass*

Procedure:

  • Pour the simple syrup in to the glass. 
  • Add the bitters
  • Pour in the bourbon 
  • Rub the strip of orange zest over the glass to release the oils and throw in
  • Muddle contents
  • Add ice cube.

A word on sugar - too many recipes specify using a sugar cube. If you do so make sure you work the sugar in to a syrup with a little water before you add the spirits. If not you'll end up with an unsweetened drink and a load of undissolved sugary clag at the bottom of your glass.
Trust us, we've been experimenting with this!

Some recipes suggest using orange bitters, this supposedly works better with a rye based Old Fashioned, though we have not tried this yet. One school of thought holds that one should use rye only, the argument being that most modern bourbons are sweet enough.

Rye whiskey is a little difficult to get hold of now, but once some is procured we shall further our researches.+

If anyone has experimented further please do report in your findings.

Bottoms up!

*For a Simple Syrup recipe see our post on The Gimlet.
*Not sure what came first, the glass or the cocktail. Any small tumbler or rocks glass will do.
*Don't over do the ice, why dilute all that bourbon?
+If you do want to experiment, but can't find a true rye whiskey, have a go with Canadian Club as it has a high rye content.


Tuesday, 3 December 2013

Ladies. And How to Keep Them Happy Over The Festive Period.

Ladies Underpinnings

Let me just say what we're all thinking, "Ooooooh!" Thank-you Kiss Me Deadly.

Yuletide is upon us. 

For chaps this presents the vexed question of what to buy one's Dearly Beloved for a present.

We're not at our best in this area of endeavour. It is safe to say that what you regard as an excellent gift, a cricket bat or an iron for example, might well result in domestic violence on Christmas morning.

Fear not, New Utility is hear to help manhood in its hour of need.

This brings us to the delicate topic of Ladies Underpinnings. Get it right and they make the perfect gift. Nothing is more guaranteed to make the little Fru shower your face with grateful kisses. Get it wrong and you'll be stumbling sheepishly in to some ghastly shop asking for a refund.

In this regard the inter-web is your ally.

Rudolf never knew what hit him...
However, a certain amount of preparation is needed first. Namely, measurements. Ask the half-portion to strip to her undergarments - aside from giving the measurer a pleasing eyeful this aides accurate readings. Measure around the, erm, Upper Leisure Areas* at their fullest point, the natural waist, the hips, and the inside leg. (This last is not vital unless planning a trouser purchase, but it helps not to give the game away too much.) For further assistance see here.

Thus equipped you are ready for the off.

Our unstinting research led to a couple of retro women's lingerie emporia. Kiss Me Deadly produce some really beautiful, but rather blood pressure threatening, under-garments. (As demonstrated here by the lovely Miss Tilda.) For a more strictly vintage silhouette have a look at What Katie Did - they specialise in fantastic 1950's reproduction unmentionables. (Though I have not had a chance to road test the latter...)

Helpfully for us gents they both have size charts against which you can check the aforementioned measurements.

For those leg men amongst you, why not treat your young lady to a pair of seamed stockings? Nothing quite sets off the Lower Leisure Areas as pair of seamed nylons....

This could be you on Christmas morning!
If you are unable to measure the female in question, or are simply too terrified, Kiss Me Deadly do have gift vouchers.

All that remains to add is a warning to not burn the goose - Ladies Underpinnings really are the gift that, ah, keeps on giving. For the sake of propriety we'll leave it at that.

A quick thank-you to the following:

Miss Tilda - general Swedish loveliness.
Mr Oliver Welwood Morrisson Esq - Tweed & nerves.
Kiss Me Deadly - unmentionables.
Christian Louboutin - sensible shoes.

Photography & constant thoughts of The Queen Mother - Mark Larner

See the full shoot here.


*It's worth having a peak at the bra she's wearing to confirm cup size.

Friday, 15 November 2013

Weekend Man Food

Slow Cooked Chilli

This dish is a firm favourite here at NU. A big one pot dish, cooked at the weekend, will feed you in to the week. You won't get bored of eating the same thing either. Chilli is versatile and can be served in a number of ways.
We normally have it with rice at first then use up any left overs to make burritos with sour cream & guacamole.

If you have the patience the chilli benefits from being left in the fridge overnight after you've cooked it. The flavour always seems to improve.

The following was is based on a recipe I found on BBC Food, but has gradually evolved over the years to what you see here. 
Most recipes use beef mince only, but I prefer the deeper more rounded flavour that a pork / beef mix gives. I have also stopped using mince. The end result is much improved by using chopped braising or stewing steak and a fatty cut of pork like shoulder.

Feel free to improvise with the amount and type of chillies and the spices, the following is merely what works for me.

Ingredients:

  1. 500g pork shoulder, roughly chopped
  2. 500g beef stewing steak, roughly chopped
  3. 2 or 3 onions, finely chopped
  4. 2 cloves garlic, crushed
  5. 2 peppers, finely chopped
  6. 1 stick celery, finely chopped
  7. 4 chillies, finely chopped
  8. 1 bay leaf
  9. 1 tbsp cumin seeds
  10. 1 tbsp coriander seeds
  11. 1 tbsp dried oregano
  12. 1 cinnamon stick
  13. 1 tsp black pepper corns
  14. 1 tbsp paprika
  15. 2 tsp cayenne pepper
  16. 1 dollop, tomato puree
  17. 2 x 400g tinned tomatoes
  18. 250ml beef stock
  19. 1 x tin lima beans
  20. 1 x tin kidney beans
  21. square, dark chocolate, chopped
  22. handful, fresh coriander, finely chopped

Method:

  1. Gather all ingredients together first. Chop all the vegetables & meat. Measure out your spices and toast all the seeds & cinnamon for one minute in a small dry frying pan. Crush in mortar & pestle (or grinder) and mix together with other spices and herbs.
  2. Heat large pan with olive or rape-seed oil. Fry the meat until browned. Remove from pan and set aside
  3. Add all the vegetables and fry for 5-6 minutes until golden
  4. Then add the spices and mix in
  5. Return the meat to pan and stir to combine
  6. Add the tomato puree, stock and tinned tomatoes. Bring to the boil
  7. Reduce heat and leave to simmer, partially covered, for 4 hours or until the source has thickened up and the meat is on the verge of falling apart.
  8. Add the chocolate, kidney and lima beans and simmer till hot through
  9. Sprinkle with the fresh coriander and serve with riceYou can use any leftover to make burritos too. This is really good with a pale ale or ballsy Spanish red wine.

If anyone has any suggestions or comments on what they put in their chilli we'd love to hear it.

Have a good weekend chaps.

Tuesday, 12 November 2013

Quince Jam

After last week's abortive effort at Quince Jelly we are pleased to report the jam part of operations was a resounding success.
Jam making - not the most manly of pursuits I hear you say. However, autumn is the perfect time to stock your larder for the rest of the year, and in keeping with first principles here at New Utility, we try to make everything from scratch.
Yes, it is perhaps easier to nip out for shop bought jam, but it is never quite as good, or as satisfying, as your own homemade efforts.


Quince jam in particular is difficult to find in most supermarkets. A fruit that has sadly fallen out of wider use, quince have a beautiful rose like flavour and, being naturally high in pectin, are ideal for jam making.

To recap for those of you who weren't paying attention last week, quince resembles a hard golden yellow pear, but is actually a member of the rose family and has an amazing rose like perfume and taste.

The jam itself can be eaten both as normal on toast or as a savoury preserve with rich meats like venison or mutton. It will keep for over a year. The original rich golden colour will darken over time to a deep red.
Later in the year you can use any left overs in desserts - a quince jam tart is one of our favourites.

The recipe is simplicity itself - quince, sugar, lemon juice. That's it. Quince are a little labour intensive to prepare but it's absolutely worth it. This jam is some of the best I've tasted.

Quince. Sugar. Lemon Juice. This recipe is rather easy.

Ingredients:

  1. 4.5lb / 2kg quince
  2. 1.75lb / 800g sugar
  3. 1 tbsp lemon juice

Method:

  1. Peel and core the quince. Cut in to chunks.
  2. Put the prepared fruit in a large bowl of water as you go, otherwise it will turn brown.
  3. Drain and transfer to a heavy pot. Fill with enough water to just cover the quince.
  4. Cover and bring to boil over a high heat. Boil for 30 mins.
  5. Drain off the liquid in to another pot if making quince jelly. (If not, discard.)
  6. Pulp in a food processor to the consistency of apple sauce.
  7. Transfer back to the pot. Add 230ml of water, the sugar and lemon juice.
  8. Bring to the boil, stirring constantly so the fruit doesn't brown
  9. Cook for about 40 mins, or until the jam melds, stirring frequently. All the excess liquid should cook off and the jam fall from the spoon in chunks when done.
  10. Leave to cool for a bit
  11. *Decant in to sterilised jars. When cooled completely, seal
Hard at work jarring the results. (Shortly before a round of toast spread with the left-overs.)


*10 minutes in a hot oven ought to do it.


Saturday, 9 November 2013

Cocktail Hour

The Gin Sour.

Continuing on last week's sour theme, today we discuss the Gin Sour. A very traditional cocktail, popular before Prohibition, this cocktail's precise history is uncertain. It was mentioned as far back as 1862 in Jerry "The Professor" Thomas' The Bar-Tender's Guide.


Again, it is worth mentioning that most modern recipes skip the egg white. Presumably over 'elf & safety concerns, but I urge you not to. The addition of egg white makes for a much smoother cocktail.

The original used soda water in the simple syrup, to my mind making the cocktail half Gin Fizz half Sour. The recipe here uses normal simple syrup.

Traditionally, gin sours were made with Old Tom gin - a sweeter style of gin popular in the 18th century and one that is making rather a comeback today. Fear not if you don't have it, one of the more botanical gins like Hendricks will work just as well.

Ingredients:

50ml Gin
25ml Lemon Juice
15ml Simple Syrup
egg white (I normally use 1 egg white for 2 cocktails)
Lemon wedge to garnish.

Equipment:

Shaker
Short glass, chilled

Procedure:

Dry shake the egg white, gin, lemon juice and syrup.
Add 2 cubes of ice and shake hard.
Strain over ice in to a short glass
Garnish with a lemon wedge & serve

Chin chin!


Wednesday, 6 November 2013

Quince Cordial

Or How Not To Make Quince Jelly...

Last week I awoke from my morning slumber to find over a kilo of quince sitting on the door mat.

One of my neighbours volunteers for an organic fruit & veg collective, KBHFF. Each week they're issued with up to 8kg of random foodstuffs. Not knowing what to do with her share, Peniila very kindly donated the fruit to New Utility.

Quince is a very old fruit. Luminous yellow in colour, in shape they resemble a small hard pear. Actually a member of the rose family, quince give off a wonderful perfume. However, their hardness means quince are a trifle labour intensive to prepare - requiring a boil to soften up. 

It is worth it. They have a fantastic rich, rosy, piquant flavour and, in my view, it is a shame they are not more popular.

Naturally high in pectin, quinces are perfect for jam & jelly making. In boiling the peeled and cored fruit for the former you're obviously left over with some cooking liquor. It is the liquid from this "first boil" that is used to make the latter. In theory.

Looks like Quince Jelly, actually isn't.

Ingredients:

2 measures (by quantity, not weight) of left over liquid form boiling the quince.
1 measure sugar (by quantity, not weight).
Lemon juice.

Procedure:

In a heavy pan add the sugar to the liquid.
Heat up until boiling, stirring frequently so the sugar dissolves and does not stick to the bottom.
Boil over a high heat for approx 30 mins until the liquid melds in to a syrup. Quantity will reduce by roughly half.
Pour in to sterilised jars and leave to cool before sealing. The jelly will set as it cools.

Pretty straightforward I hear you say. Indeed, I've made quince jelly before with complete success following the exact procedure above. However, this time around I could not get the stuff to properly meld, and therefore properly set. I was essentially left with a litre of loose syrup. If anyone has any ideas as to why I'd be glad to hear them.

Not a chap to be defeated, I decanted said liquid in to spare bottle and intend to use the stuff as cordial. Early thinking is that I might try a Quince Gimlet, or "Quinclet."

What I ended up with...


The jam phase of operations was however an unqualified success, on which more soon.


Monday, 4 November 2013

The Bakers Boy Cap

... or News Boy... or Gatsby.

Whatever name it goes by this type of cap is something of a classic. Time was a chap would not think of leaving the house without some form of titfer covering the brylcreemed bonce.
Popular from roughly 1890 to 1930 the Bakers Boy was just the hat to do it, worn not only by boys but working men across Europe and America.
Ah, the halcyon days prior to nanny state anti smoking legislation. Two likely lads c 1920. (Public domain image)
Hurdling the class divide, the cap was also a favourite of the wealthy sportsman - with very full cut versions worn for golf or motoring.

Rightly these caps have seen something of a resurgence in popularity in recent years. A relative of the flat cap, what distinguishes the Bakers Boy is that, unlike its cousin, the cap is divided in to eight panels, with a button on the crown. In cut the cap is also much rounder and fuller.

Left to right: examples in Harris Tweed, Tweed / Cotton mix and Donegal Tweed.
I have a bit of a thing for these caps and have actually been banned by Management from purchasing more. 
I wear mine year round and have them in various weights form winter friendly Harris Tweed to a lighter summer weight tweed/cotton mix. They look fantastic with both more formal "walking out" attire or working rig.

Bates Hats - sadly they had to leave their own historic 21A Jermyn St premises, but thankfully are still trading in Hilditch & Key at no. 73.
Bakers Boy caps are very popular, with several brands jumping on the trend. 
If, like me, you prefer accurate examples that have been properly cut & sized you could do no worse that have a word with David Saxby in London. He makes his own from an array of different tweeds and would be happy for you to choose your own.
Bates Hats in Jermyn Street made the Donegal Tweed cap shown here. I quite like the slightly slimmer cut and larger peak of this cap, and alternate it with the fuller "golfer" type caps in my collection.
Those on a budget should have a look at the Harris Tweed example made by Failsworth*.

Herringbone Harris Tweed cap form Failsworth.

With the Festive Season looming, there is perhaps no better time to drop a heavy hint or two to your Significant Other. (Assuming of course they have not adopted the entirely fat-headed "no more caps, please darling" policy..)

*They still seem to be building a website. In the meantime you can purchase their caps here.

Sunday, 3 November 2013

Chaps Can Bake Too...

Spiced Banana Cake.

Left recently with a glut of over ripe bananas Management suggested I ought to try banana cake.
Not having made it myself before I settled on a Hairy Bikers recipe.
I've spiced it up a bit with extra cinnamon and cloves, and dispensed with the vegetable oil in favour of a little more butter.

Don't let the loaf tins fool you. It's actually a cake.
(The original had pecans in, but as my dearly beloved is lethally allergic to nuts I skipped them. If you're minded too you can add chocolate chips rather than raisins.)

Ingredients:

  1. 5 or 6 very ripe bananas
  2. 150g/5oz butter, softened, plus extra for greasing
  3. 335g/11½oz caster sugar
  4. 4 eggs
  5. 450g/1lb plain flour
  6. 2 tsp baking powder
  7. 1.5 tbsp ground cinnamon
  8. 2 tsp ground cloves
  9. ½ tsp salt
  10. 225g/8oz rasins

Procedure:

  1. Preheat the oven to 200C/400F/Gas 6. Grease and line two medium (or three small) loaf tins.
  2. Mash the bananas in a bowl and set aside.
  3. In a separate mixing bowl, cream the butter and sugar together until pale and fluffy. Beat in the eggs, one at a time, then stir in the mashed banana mixture until well combined.
  4. Mix the flour, baking powder, ground spices and salt together in another bowl and lightly fold into the banana mixture. Add the raisins and fold together lightly.
  5. Spoon the cake mixture into the loaf tins and bake in the oven for 1½ hours, or until risen and golden-brown. Check after one hour and reduce the oven temperature slightly if the loaves are browning too quickly on the top, or cover the loaves loosely with aluminium foil.
  6. Leave the banana bread to cool in the tins, then turn out and serve in thick slices.
Goes perfectly with your tea on a Sunday morning.


Saturday, 2 November 2013

Cocktail Hour

The Bourbon Sour

After the recent glut of Gin based beverages it's time to surprise our livers with another favourite spirit of mine - bourbon. I bow to no man in my appreciation of sour cocktails, and the Bourbon Sour is an absolute favourite.


The rather lovely barmaid at Ruby swears by Four Roses, however as I have Makers Mark at home that's what I'm using. The sweetness of the bourbon, particularly the vanilla note to Makers Mark, offsets the sharpness of the citrus perfectly.
Some sour recipes skip the egg white. I would urge you not to - it adds an extra smoothness to the finished article and is worth the minimal faff of separating an egg.

Ingredients:

  1. 50ml Makers Mark
  2. 30ml lemon juice
  3. 15ml simple syrup
  4. 1 egg white
  5. ice
  6. lemon wedge

Equipment:

  1. shaker
  2. short glass

Procedure:

  1. Dry shake the egg white first. (This improves the texture.)
  2. Add the lemon juice, bourbon, syrup and a couple of ice cubes.
  3. Shake well.
  4. Strain over ice in to a short glass.
  5. Garnish with a lemon wedge.

Bottoms up chaps! Enjoy.


Friday, 1 November 2013

Weekend Man Food

Pot Roast Pig Cheeks With Chorizo.

I make no apology for featuring another pork recipe this week... I do live in Denmark after all.

Slow cooked pork goodness.
I don't need to explain what part of the pig the cheeks come from, but being part of the head they are technically offal. Do not let this put you off. Pig cheeks are some of the tastiest meat I've ever had, with a much richer flavour than other parts of the animal.

A sinewy cut, cheeks respond wonderfully to a long slow cook. Unwanted by the ignorant masses, cheeks are thrown in to the mincer by most butchers, but given a bit of notice they will be happy to prepare you some.

To Irma's (Danish supermarket) immense credit they have started stocking pig cheeks at the weekends - presumably after they've butchered enough pig during the week. Grabbing them immediately I set about researching how to cook them.

This Spanish influenced recipe is my version of one I found here.

Ingredients:

  1. 1 medium carrot, finely chopped
  2. 3 or 4 celery stalks, finely chopped
  3. 2 small onions, finely chopped
  4. 3 cloves garlic, crushed
  5. 2 bay leaves
  6. 150g chorizo, chopped in to largish chunks
  7. 1 tbsp paprika
  8. 2 tsp mixed herbs
  9. 8 pig cheeks, cut into large chunks
  10. 1 tin lima beans
  11. 300ml chicken stock
  12. 250ml red wine
  13. 2 tins chopped tomatoes
  14. small bunch parsley, chopped
  15. rapeseed oil, for frying

Procedure:

  1. Heat oil in a large heavy pan and fry the chorizo until the fat in the sausage starts to run out.
  2. Add the onion, carrots, celery and garlic. Fry until soft and golden.
  3. Add the paprika and fry for another minute. Take out of pan and set aside.
  4. Add a dash more oil and thoroughly brown the meat.
  5. Return the vegetables and chorizo to the pan. Add the mixed herbs.
  6. Add the wine. When reduced by half add the stock and tomatoes and bring to the boil.
  7. Turn down heat, partially cover, and simmer on the stove for 4 hours, or until the meat is just falling apart.
  8. Add the lima beans and leave to heat through.
  9. Before serving mix in the chopped parsley.
  10. Serve with rice or potatoes. Wash down with a robust Spanish wine.
This recipe is really quite delicious, a carnivores dream.

Have a good weekend chaps!


Thursday, 31 October 2013

The Battledress Blouse

The Grand-Daddy of cropped work jackets.


The DNA of the humble battledress blouse can clearly be seen in post-war casual and work jackets sported by the newly demobbed masses - most famously in civilian versions of the American "Ike" jacket.

Looking for a replacement for WW1 era Service Dress (SD) that was both more suited to vehicle mounted operations, and allowed our chaps better ease of movement, The War Department, after several trials, settled on Battledress, Serge in 1937.
Issued on a large scale in 1939, this is the uniform that most British and Dominion troops set off to war with.

Made from heavy wool serge, with mixed green and brown fibres, these are robust little jackets. Much shorter than its SD tunic predecessor, the BD blouse was originally worn over a collarless shirt and buttoned at the back to a heavy pair of matching trousers.
With an extremely high waist line that hovered dangerously close to the nipples, this was clearly meant to give a silhouette that emphasised height - important when attempting to instil fear in the the hearts of advancing German infantry!*

War Department size label.
1949 Pattern blouse. Notched collar, for wear with a shirt & tie. 

Various patterns were made over the years. The 1937 version had a rise & fall collar, buttoned to the top, (though officers often had theirs tailored to wear with a collar & tie.)
The blouse you see here is the 1949 version, made in 1952 by Prices Tailors Ltd. (There were a myriad number of contractors over the years. Sadly I could not find any information on Prices.)

The 1949 blouse could still be buttoned up against the elements. This reflects its dual use as combat and formal uniform after WW2.
Sporting an open notched collar this blouse was meant to be worn with a shirt & tie.
This type of battledress was often used as an alternative "walking out" uniform to Service Dress. As a combat uniform it was still worn in Korea, but fell in to disuse with the issue of Herringbone Twill uniforms poached from the Americans.

As our own cotton combat uniform came in to service there was no real need for two types of formal uniform and battledress ceased to be issued in 1961.


Pleated breast pocket with exposed button.


Smart fly front over the buttons. Acres of velcro and zips have replaced buttons on today's uniforms, but the fly front served the same purpose - preventing buttons catching on bits of kit.


I will say that wool serge, though heavy, creases easily. Unusually for Army uniform the blouse seems stubbornly resistant to all attempts to iron these creases out of it. Quite how this went down with generations of Sergeant Majors I'll never know.

Belted up, these blouses look rather snappy. If you prefer that louche, some would suggest scruffy officer look, leave it undone!
With pleats front and rear these blouses are quite roomy so, worn with some heavy jeans or flannels, they look great over a guernsey or a submariner. Just the thing for cutting about town in late autumn. Or a clandestine meeting with your resistance contact to blow up a bridge!

Interestingly The War Department also issued a denim working dress version of this uniform. As the name would suggest it was meant for menial work, however it was widely issued to front line Tommies on the Mediterranean Campaign. Plans are afoot to track down a denim blouse as soon a possible.

Earlier examples are becoming scarce, but post war versions are still straightforward to find. You can also still easily get hold of the later Greek & Dutch Army blouses. I found mine on Fleabay, but it is worth checking surplus suppliers to see what they have. There are also various reproduction companies making copies for re-enactor types, but I cannot vouch for these. I'd argue you're better off with an original.

*Apparently such large stocks of battledress blouses were left behind at Dunkirk that they were recycled by the Germans and issued to U Boat crews. Later in the war, with Germany unable to produce enough wool for their longer uniform tunics, in 1944 they introduced their own version made from shoddy (recycled wool.)